User Guide
Everything about installing and jumping with AltiFenix. Questions: hello@altifenix.com.
What AltiFenix is
AltiFenix turns a Garmin watch into a glanceable barometric skydiving altimeter, modeled on the L&B Viso. It shows a large above-ground-level (AGL) altitude, zeroes itself automatically on the ground, and logs every jump hands-free (exit, deploy, freefall time, max vertical speed, canopy time). The altitude is barometric, with optional haptic altitude alerts. GPS is used only for the optional DZ-direction arrow and, when Share Diagnostics is on, the uploaded diagnostic track.
⚠ AltiFenix is NOT a primary altimeter. It is a backup / awareness instrument only. It is barometric, updates about once per second, and lags in freefall. Always jump with a certified primary visual altimeter, an audible altimeter, and an AAD.
See the Safety, Privacy & Consent page – you must read and agree to it before testing.
Installing the app (side-load)
Getting the app
You download AltiFenix yourself from this website:
- Sign up at altifenix.com (name + email; tick the consent box for beta testing).
- Open the personal link we email you. It takes you to a page that lets you download
AltiFenix.PRGfor your exact watch model – pick your model from the list and download it. - Install it over USB (below), then link the watch to your account with the pairing code (see Linking your watch).
Installing is one file: copy AltiFenix.PRG (the app you just downloaded) onto the watch over USB, into GARMIN/APPS/.
Optional (beta): also create an empty text file named AltiFenix.txt in GARMIN/APPS/LOGS/ (create LOGS if missing). It enables the on-watch diagnostic log – only useful if we ask you for logs when something goes wrong. Jump diagnostics otherwise upload on their own via Share Diagnostics.
Use a real USB data cable (not a charge-only one) and wake / unlock the watch so the computer can see its storage.
On macOS
macOS Finder doesn't handle Garmin's USB (MTP) reliably, so use OpenMTP (free): openmtp.ganeshrvel.com.
- Install OpenMTP. The first time you connect the watch, macOS may ask for permission. If transfers fail or the watch never shows up, open System Settings → Privacy & Security → Accessories, find the watch, and set it to Always Allow.
- Plug the watch in, then wait 10–15 seconds before opening OpenMTP. It often fails to connect if you open it too soon. If it does fail, quit OpenMTP, wait, and reopen it – that usually fixes it.
- In OpenMTP, switch the device pane to the watch and open the
GARMINfolder. - Copy
AltiFenix.PRGintoGARMIN/APPS/(and, if you want the optional diagnostic log, an emptyAltiFenix.txtintoGARMIN/APPS/LOGS/). - Safely eject the watch. AltiFenix now appears in the watch's apps/activities list.
On Windows
Windows talks to the watch natively over USB (MTP) – no extra software is needed (and you do not use Garmin Express for this).
- Plug the watch in and unlock it. It appears in File Explorer under This PC as a portable device named after your watch (e.g. fenix 8). If it shows up empty or not at all, give it a few seconds, then unplug/replug; if still empty, reboot the watch and try again.
- Open the device → Internal Storage (or Primary) →
GARMIN. - Copy
AltiFenix.PRGintoGARMIN\APPS\(and, if you want the optional diagnostic log, an emptyAltiFenix.txtintoGARMIN\APPS\LOGS\, creatingLOGSif missing). - Safely eject the watch. AltiFenix now appears in the watch's apps/activities list.
Normal, don't panic: on current fenix watches the AltiFenix.PRG file disappears from GARMIN\APPS\ the next time you connect – the watch has taken it into internal storage. The app is still installed; only the loose file is hidden.
Linking your watch
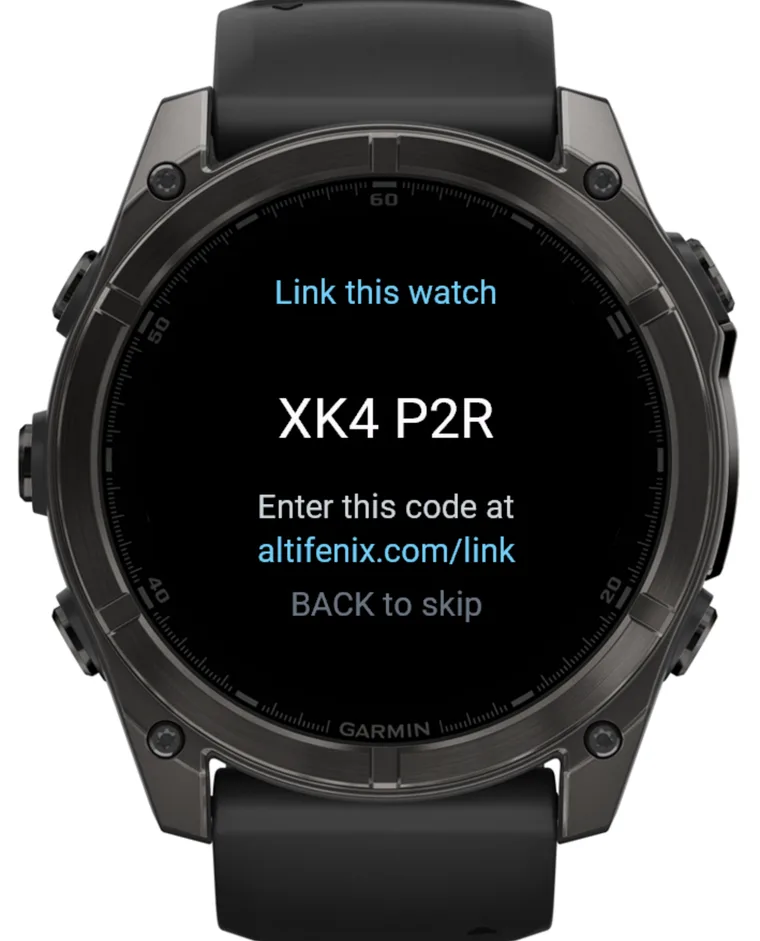
The linking screen is the first thing you'll see when you open a freshly installed app on the ground. Your account (your name, and whether you're a beta tester) lives on the AltiFenix server, not in the app, so the build itself contains no names – linking the watch to your altifenix.com account is what puts your name on it:
- On first start, if the watch isn't linked yet and you're on the ground, AltiFenix opens a short linking screen showing a 6-character code (e.g.
XK4 P2R) andaltifenix.com/link. Enter that code on the link page (signed in via your personal email link) and, within a minute or two, About shows your name. Press BACK to skip the screen and go straight to the altimeter (it won't interrupt you again this session, and it never appears once you're airborne). - Any time later, open Settings ▸ Link Watch to show the code again.
- No connection? The screen shows your short device code and a SELECT to retry hint instead. Link later from Settings once you're back online.
- To unlink, open Settings ▸ Unlink Watch and confirm. About drops your name and the linking screen returns on the next start.
Quick start
- Install it (see Installing the app above).
- Open the app. On the very first start you'll see the linking screen; after that (or one BACK) it's the Ground screen with a big altitude near
0. - Open Settings (tap the START button) and set:
- Units – Meters or Feet.
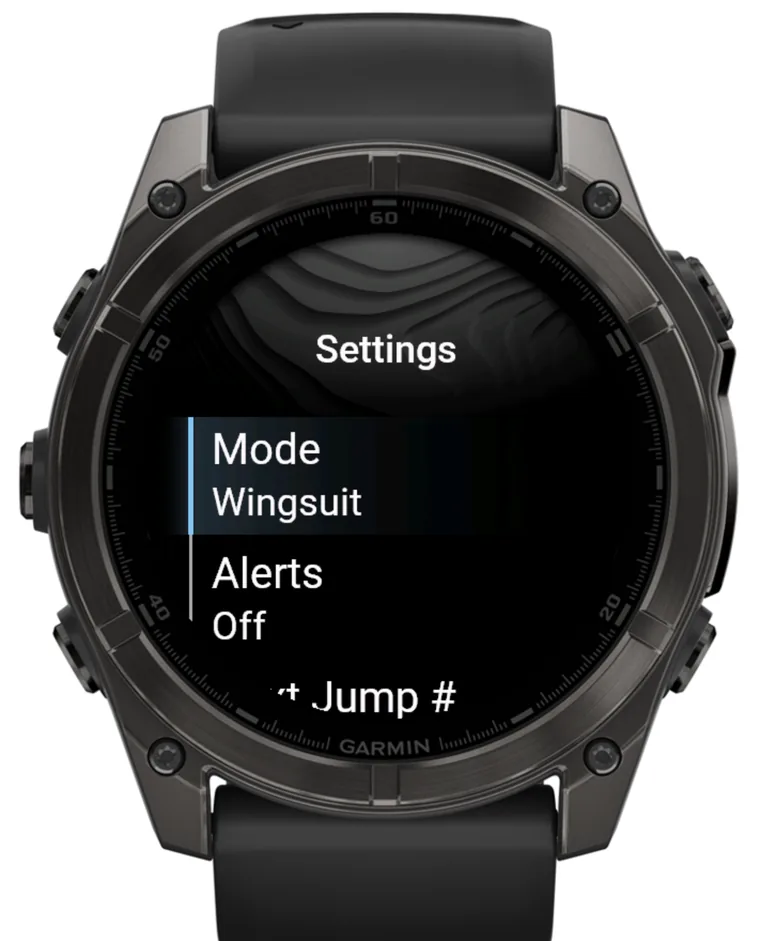
- Mode – Skydive or Wingsuit (sets jump-detection thresholds).
- Next Jump # – type your real current jump number so the logbook counts onward from your actual total.
- (optional) DZ Arrow / Compass, and Set DZ while standing in the landing area, if you want the direction-to-DZ arrow in the air (climb, freefall, and under canopy).
- Before you trust it in the air, run Simulate Jump from the Debug menu (see Bench tools) to watch every screen on the bench, and do a ground test (walk up a hill or ride an elevator and watch the number track).
The screens
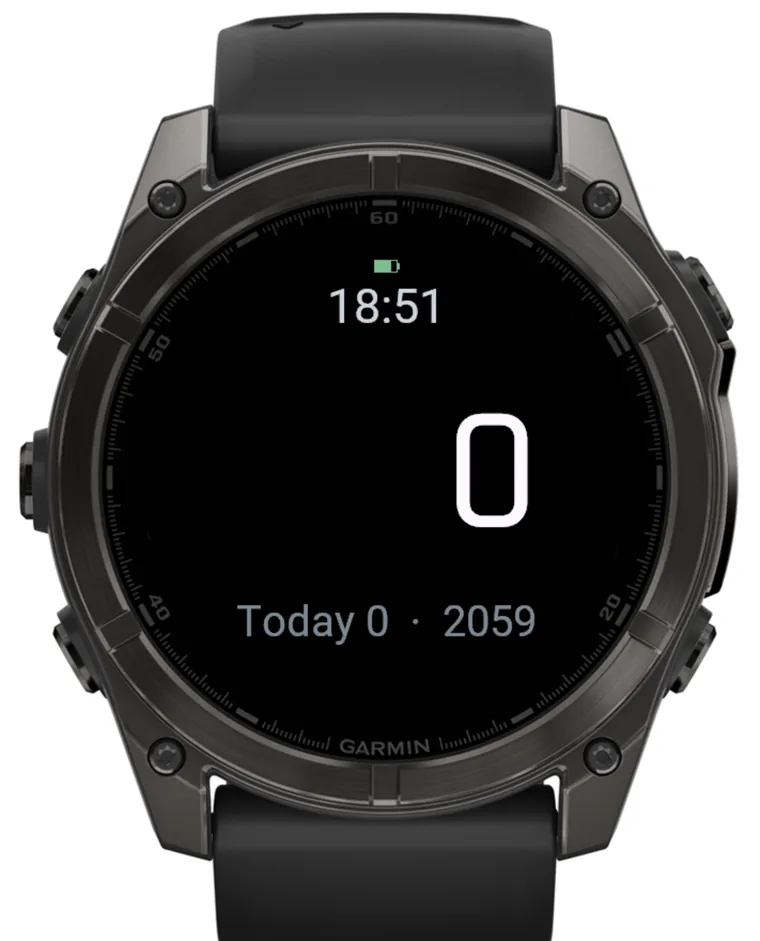
Ground screen
Shown whenever you're on the ground. It draws:
- Battery glyph at the top (green ≥ 40 %, amber 15–40 %, red < 15 %).
- Current time just below it.
- The big altitude number – live AGL, held at
0on the ground (this0is the proof that auto-zeroing worked). With a DZ Offset active it instead reflects the offset, so it can read a negative number on the take-off ground (see DZ Offset). - A stats line:
Today N · <lifetime total>– jumps logged today, then your lifetime total.
From the Ground screen: DOWN opens the Logbook, UP opens the Info / currency card, START opens Settings.
In-air screen
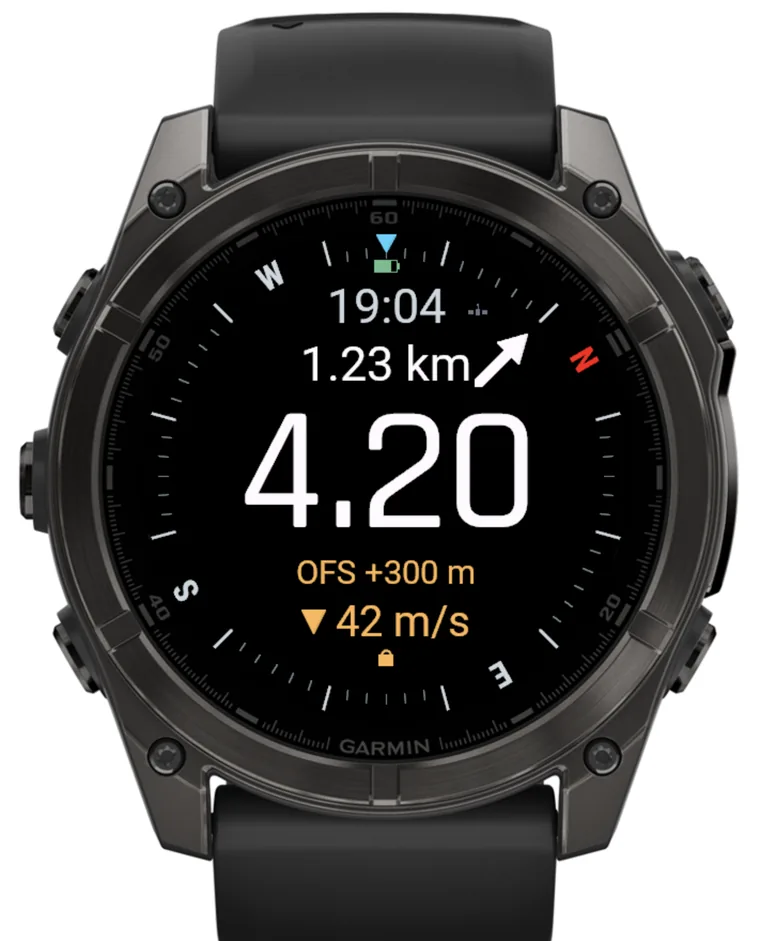
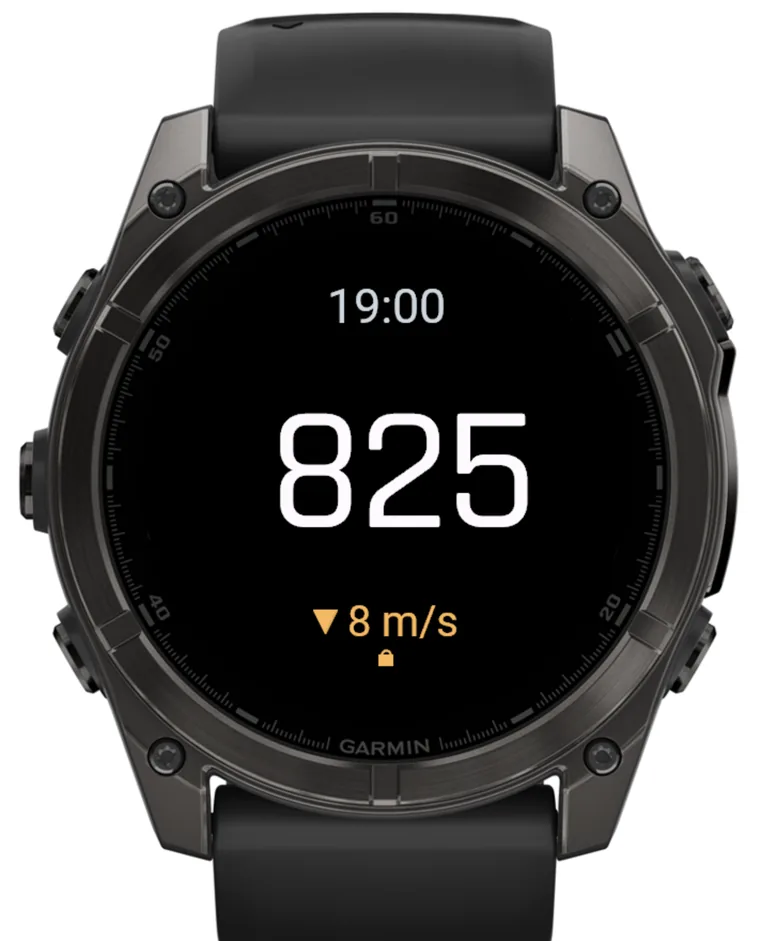
Shown automatically once you're climbing, in freefall, or under canopy. It draws:
- Battery + time at the top.
- The big white altitude number (AGL), in the Viso number format (below).
- A small amber descent-rate line at the bottom: a triangle (▼ falling / ▲ climbing) plus the speed in m/s or ft/s. This figure is approximate – at ~1 Hz the descent rate under-reads and lags in freefall; treat it as a canopy aid.
- Lock padlock (amber, bottom-centre) whenever input is locked (see Input lock).
- An amber
OFS …badge under the time whenever a DZ Offset is active. - The screen is kept lit while you're in freefall and under canopy, so the number stays readable without waking it (the Bright Screen setting; “During Jump” by default).
- If Compass is on: a heading-up compass ring on the rim with a numeric bearing; North is red. If the magnetometer isn't calibrated it shows Calibrate instead of a ring.
- If DZ Arrow is on: an arrow pointing toward your saved DZ (in the climb, in freefall, and under canopy), with distance shown near the top, plus a small GPS satellite icon (grey = off, amber = acquiring, green = fix, red = denied). The arrow is amber while the fix or the saved DZ is rough and turns white once both are trustworthy. It draws on a rough (POOR) fix too – a coarse bearing home beats none. In the climb it points back toward the DZ you're climbing away from (a spotting aid), and with no DZ anchored yet it simply draws nothing.
The number format (L&B Viso style)
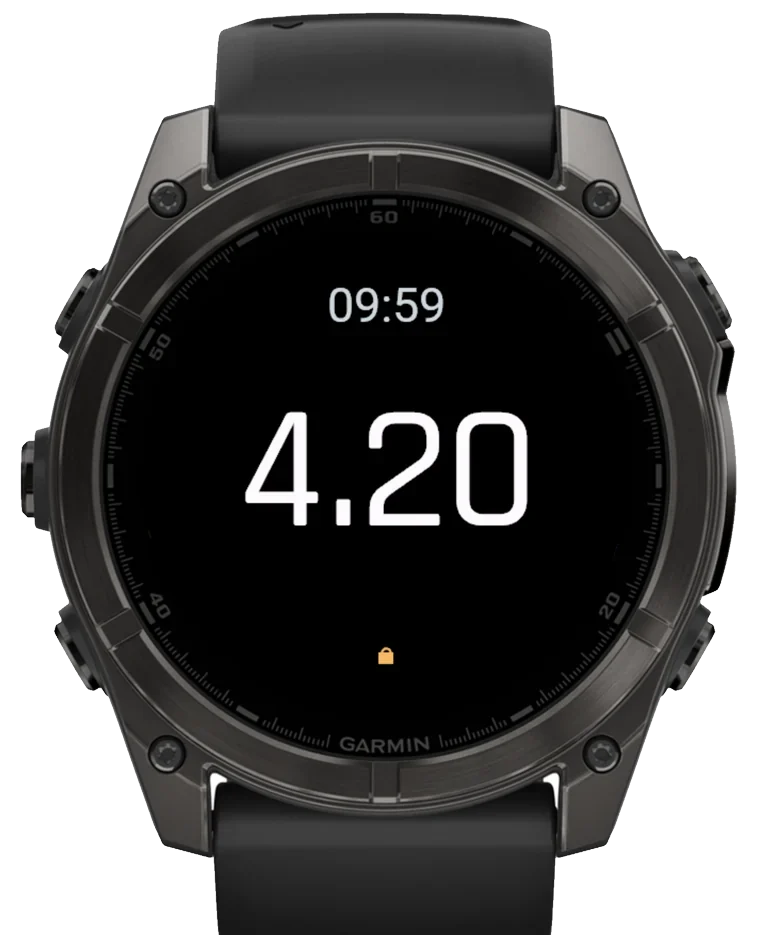
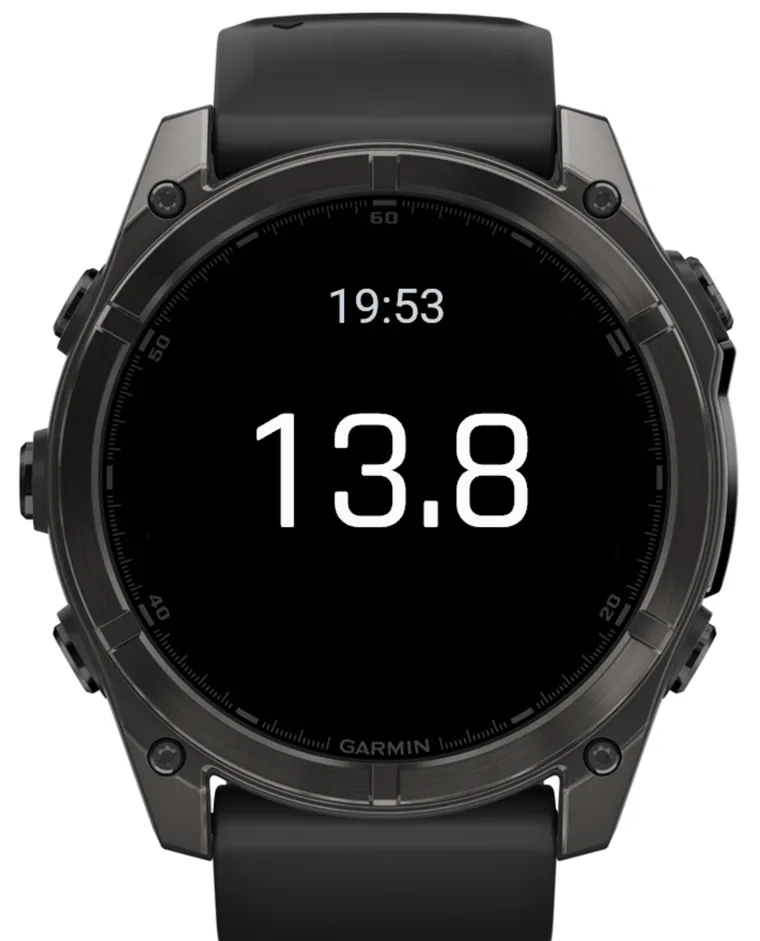
The altitude stays about 3–4 digits wide at any height by changing decimals with magnitude. The same rule applies to both units; the small m/ft sits to the lower-right of the number.
| Reading (in your unit) | How it's shown | Example | Means |
|---|---|---|---|
| below 1000 | whole number | 850 | 850 |
| 1000–9999 | thousands, 2 decimals | 4.25 | 4250 |
| 10000 and above | thousands, 1 decimal | 14.0 | 14000 |
In meters a typical jump uses mostly whole numbers (exit ~4.00, canopy 1.00, pattern 300). In feet you'll see all three (exit 14.0, freefall 5.50, pattern 850).
Buttons & navigation
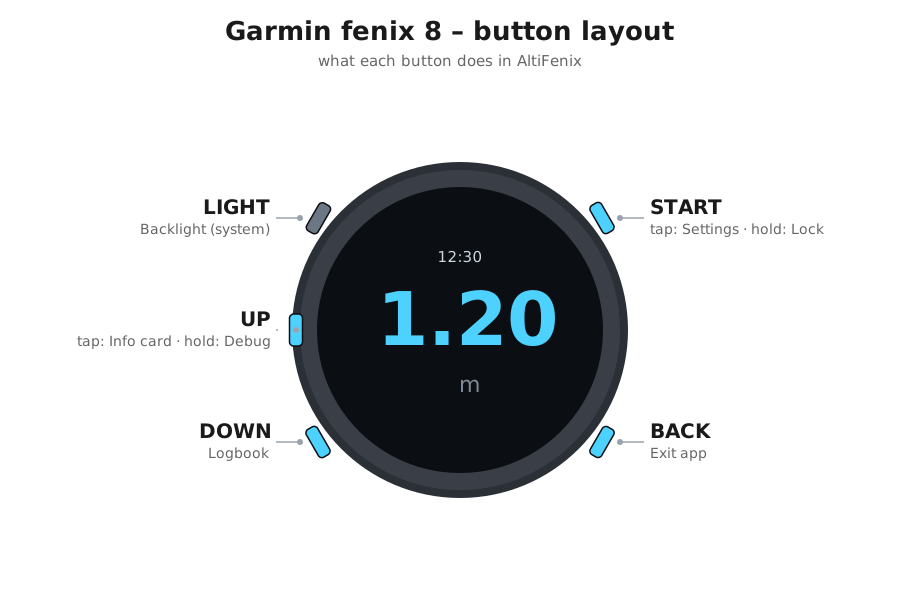
AltiFenix uses the 5 physical buttons (no touch). Behaviour depends on whether input is locked (below).
| Button | Action |
|---|---|
| START (short tap) | Open Settings (ground only; ignored while locked) |
| START (triple-tap, while locked) | Unlock – your escape hatch (three quick taps; see Input lock) |
| UP (long-press / “MENU”) | Open the Debug / Info menu |
| UP (short, from Ground) | Open the Info / currency card |
| DOWN (from Ground) | Open the Logbook |
| BACK | Exit the app (ignored while locked) |
Input lock
To stop a button or wrist-knock from changing the screen or quitting the app mid-jump, AltiFenix locks input automatically while you're airborne (climb, freefall, canopy) and unlocks automatically after you land. While locked, an amber padlock shows at the bottom and navigation does nothing – except a triple-tap of START (three quick presses), which always unlocks so you're never trapped. A manual unlock is cleared at the next phase change, so AUTO behaviour resumes (e.g. it re-locks if you're still airborne, or stays unlocked once landed).
Why three taps and not a long-press? On the Fenix 8 a hold of START is a system hotkey (Voice Command) that the watch grabs before the app sees it – so a long-press can't be a reliable escape hatch. Quick taps are always delivered to the app, hold-hotkey or not.
(A Simulate Jump locks exactly like a real jump – that's the point. Use the triple-tap START unlock to escape and cancel the sim, same as on a real jump.)
How auto-zeroing works
The altitude is AGL because the app zeroes itself to the drop-zone ground:
- When the watch is still on the ground for a short while, it sets the ground reference pressure – so the readout reads
0at the DZ and corrects for the day's barometric drift before each load. It re-zeros to a new ground level once the pressure has settled – so moving to a different elevation (a different boarding spot, or riding up to a higher point) clears itself once you stop – while a slow lift-off creep, which keeps moving and never settles, is held so it can't quietly carry the zero up with you. - The moment a jump ends (a confirmed landing) it snaps back to
0at the landing pressure right away, instead of waiting for the next background pass – so if the reference drifted during the jump, it's corrected as soon as you're down. - Once it detects climb / freefall / canopy, re-zeroing is locked out until a confirmed landing. It never re-zeros in the air.
If you forget to open the app before takeoff
AltiFenix runs a small background watcher about every 5 minutes while the app is closed. It does two things:
- Tracks the ground pressure, so if you open the app mid-climb it can still seed a correct AGL zero instead of showing garbage.
- Nudges you: when it sees you climbing a few hundred metres at aircraft rate it raises a “Climbing – open AltiFenix?” prompt. Open the app and the altitude will be correct for the rest of the jump.
So the two “forgot to open it” cases are both handled: respond to the prompt, or just open the app yourself during the climb.
The prompt needs a genuine climb rate (about a jump plane's, ~2 m/s or more), not just altitude gained, so everyday ascents like driving up a hill or a mountain road won't trigger it.
Settings menu (START)
Grouped top to bottom: jump setup (Mode / Alerts / Next Jump #), display (Units / Bright Screen / Compass / Lock Screen), the Drop Zone submenu, then Link Watch, Share Diagnostics, and About last.
| Item | What it does |
|---|---|
| Mode | Skydive / Wingsuit – swaps the jump-detection profile live |
| Alerts | On/Off + per-phase vibration alarms at set altitudes (default Off – opt-in; see below) |
| Next Jump # | Type your current jump number; the logbook counts on from there |
| Units | Meters / Feet |
| Bright Screen | Off / During Jump (freefall+canopy, default) / In Air (climb too) / Always – when to keep the screen lit |
| Compass | On/Off – the in-air compass ring |
| Lock Screen | Locks the readout right away – handy to re-lock after a triple-tap unlock in the air |
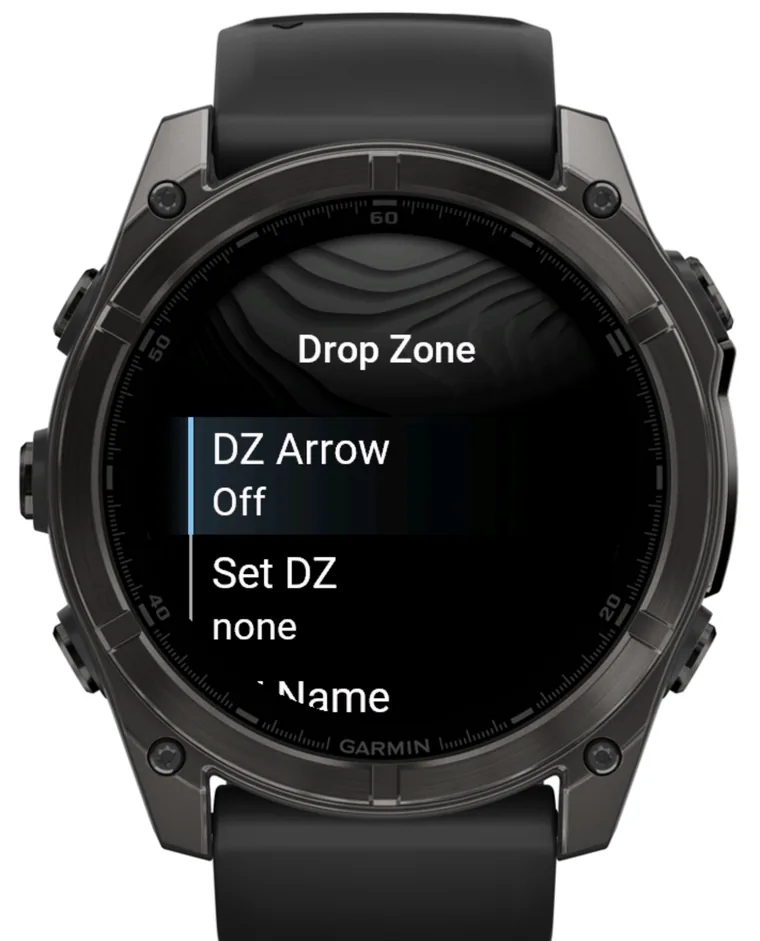
| Drop Zone | Submenu grouping the four DZ settings below (DZ Arrow / Set DZ / DZ Name / DZ Offset). Its sublabel shows the current DZ name – what you typed, or the name matched from your Set DZ position – or — when none. |
| ↳ DZ Arrow | On/Off – the in-air arrow toward your saved DZ |
| ↳ Set DZ | Capture your current GPS position as the DZ (do this in the landing area). Tries up to 3 min for a good fix, then stores the best it has (a rough one is marked ~); shows no GPS – try outside if nothing. A saved DZ auto-clears at local midnight. The captured position is matched against a built-in dropzone list (within 3 km) and the resolved DZ name is recorded on every jump you log while it's set. |
| ↳ DZ Name | The dropzone name stamped into your logged jumps. Auto-filled by Set DZ when your position is within 3 km of a known DZ; type it here to name an unlisted/new DZ, fill it in after a no-fix capture, or correct a wrong guess. An empty entry clears it. Shows — when unset. |
| ↳ DZ Offset | Off / a signed value – correct the readout when take-off and landing are at different elevations (see below) |
| Link Watch / Unlink Watch | Link this watch to your altifenix.com account so About shows your name. Link Watch shows a 6-character pairing code to enter on the site; once linked the row becomes Unlink Watch (with your name), and choosing it (after a confirmation) removes the link. See Linking your watch. |
| Share Diagnostics | On/Off (default On). Uploads barometer and GPS location data plus jump events to the AltiFenix server to help improve the app. Needs your phone connected (or watch Wi-Fi); it retries later when offline. Turn Off to keep all data on the watch. |
| About | App identity, your Unique ID page, build version, and the safety disclaimer (6 pages, UP/DOWN; the disclaimer spans the last 3) |
Privacy: Share Diagnostics is the only setting that sends data off the watch. With it on (the beta default), the app uploads barometric data, your in-air GPS track, and app events (including any DZ coordinates you save) to the AltiFenix server at api.altifenix.com (EU-hosted), tagged with your watch's device identifier (no name, Garmin account, or email is sent in the upload). It's on by default so we can debug real jumps; turn it off any time to keep everything on-device. Full details and your GDPR rights are on the Safety & Privacy page.
About screen: your name and your Unique ID
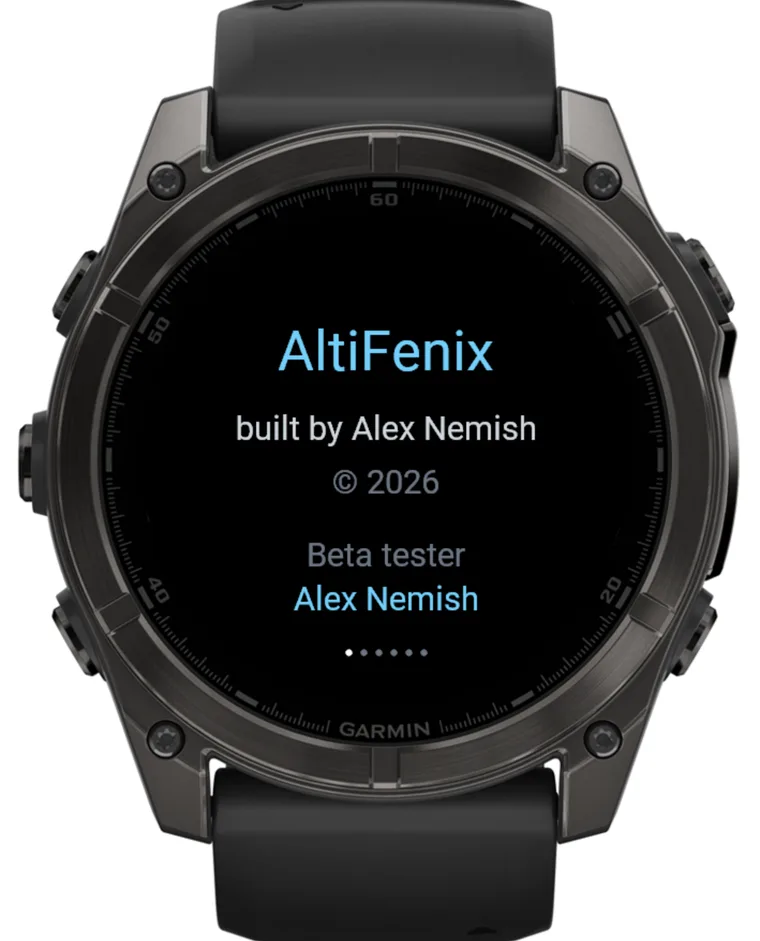
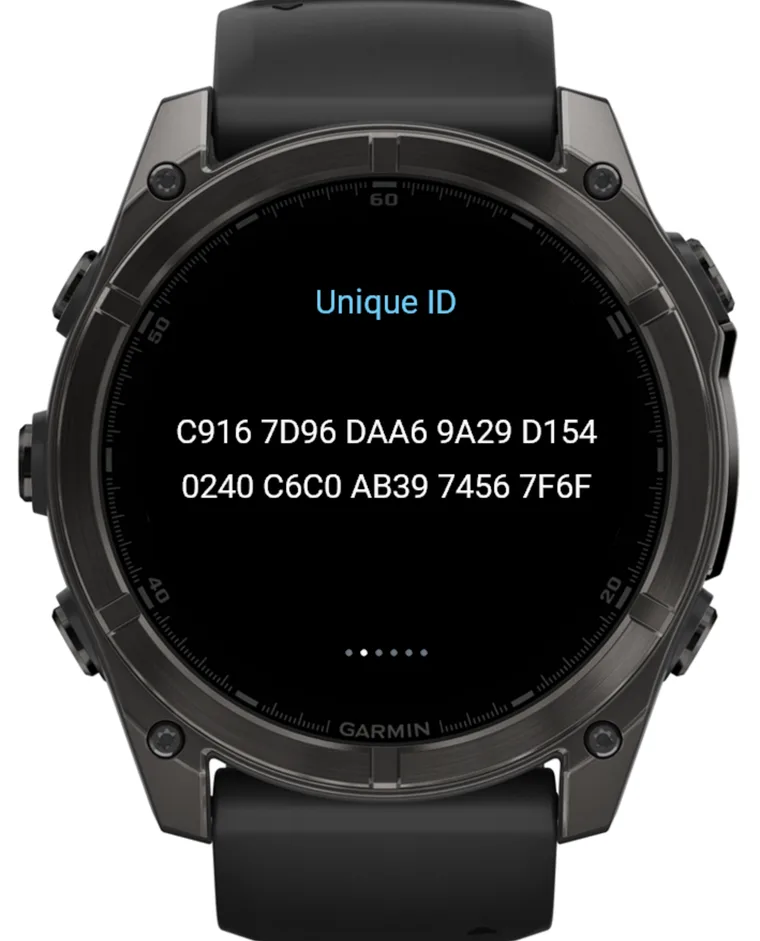
About has two identity pages, in order:
- Identity (page 1): the app name and author, your license status (
Licensed - paid,Beta tester,Licensed - comp,Trial - N jumps left,Blocked, orUnlicensedonce the trial is spent), and – once your watch is linked to your account – your name. If support ever asks “what does the last line of About say?”, this is it. The status line appears as soon as the watch has reached the server once, even before you link it, so you can see how many trial jumps are left from the start; only your name waits for the link. - Unique ID (page 2): your watch's full device ID as two lines of uppercase 4-character groups. This is the identifier your diagnostic uploads are keyed by.
Altitude alerts (vibration)
AltiFenix can buzz your wrist when you pass set altitudes during climb, freefall, and canopy. It's vibration only – nothing changes on screen – so it works the same on every watch and you can feel it without looking (handy when you can't read the screen at freefall speed). The number of buzzes tells you which alarm: more buzzes = lower / more urgent.
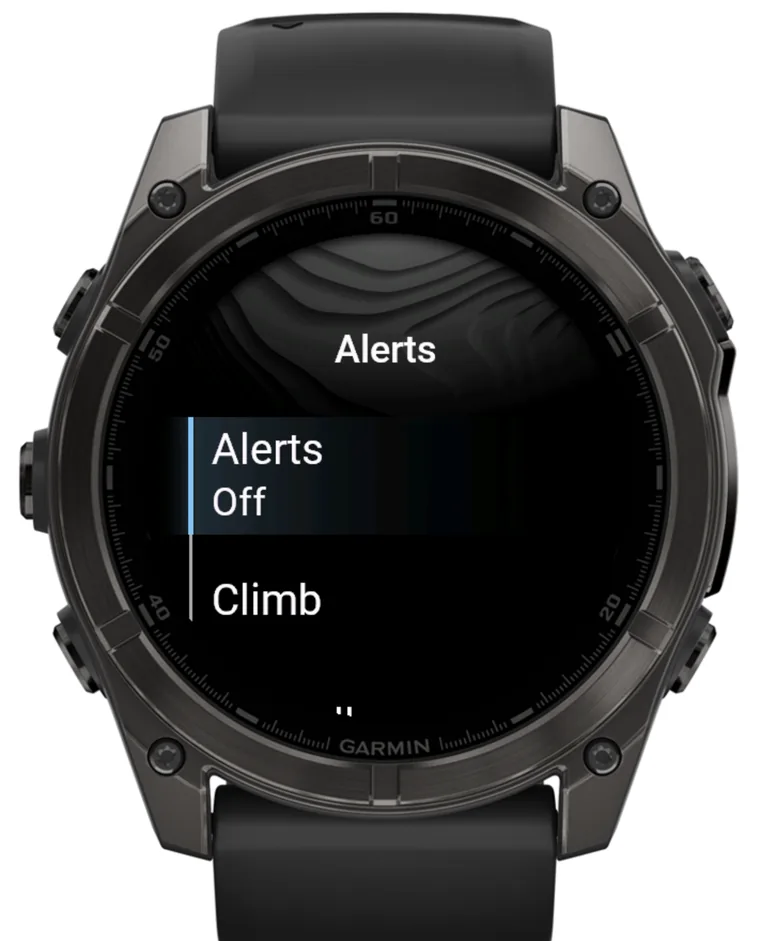
Alerts ship Off – this is a backup/awareness altimeter, not a primary, so it won't buzz unless you turn it on. Flip the master On in Settings ▸ Alerts to enable them; the slots below come pre-configured, so On is all it takes.
Defaults (each alarm is an altitude + a buzz count):
| Phase | Buzzes at (default) |
|---|---|
| Climb (going up) | 300 m · 2000 m · 3000 m – 1 buzz each |
| Freefall (coming down) | 2500 m → 1 · 2000 m → 1 · 1500 m → 2 · 1000 m → 3 · 600 m → 15 (hard deck, a long ~9.6 s buzz) |
| Canopy (coming down) | 300 m → 1 · 200 m → 2 · 100 m → 3 |
To change them: Settings ▸ Alerts → master On/Off, then Climb / Freefall / Canopy → pick a slot → set Altitude (typed in your active unit), Pulses (1–15), or Enabled.
Good to know:
- Alarms are phase-aware: a freefall alarm only fires in freefall, a canopy alarm only under canopy – so the 600 m freefall hard deck won't buzz when you're already under canopy at 600 m.
- Each alarm fires once per jump as you cross it.
- Buzzing uses the watch's vibration motor: it only works while AltiFenix is the open app (it is, during a jump) and obeys your watch's system vibration setting – if vibration is off on the watch, there's nothing to feel.
DZ Offset (take-off and landing at different elevations)
Normally AltiFenix zeroes itself to the ground it's sitting on, so the readout is 0 at the DZ. DZ Offset is for the case auto-zero can't see: you board at one elevation but land at another – a mountain DZ, a demo/exhibition jump, a cross-country.
- Open Settings ▸ DZ Offset and type a signed value in your active unit: landing-area elevation − take-off elevation.
- Landing area higher than where you board → a positive number (e.g.
+300). - Landing area lower → a negative number (e.g.
-300).
- Landing area higher than where you board → a positive number (e.g.
- A confirmation previews the result – e.g. “Landing 0 / take-off −300 m” – before it takes effect. (Entering
0turns the offset off.)
With an offset set, the readout shows 0 at the landing area and a negative number on the take-off ground (you really are below the landing area there). The offset also applies to the logged exit/deploy altitudes, so the logbook matches what you saw.
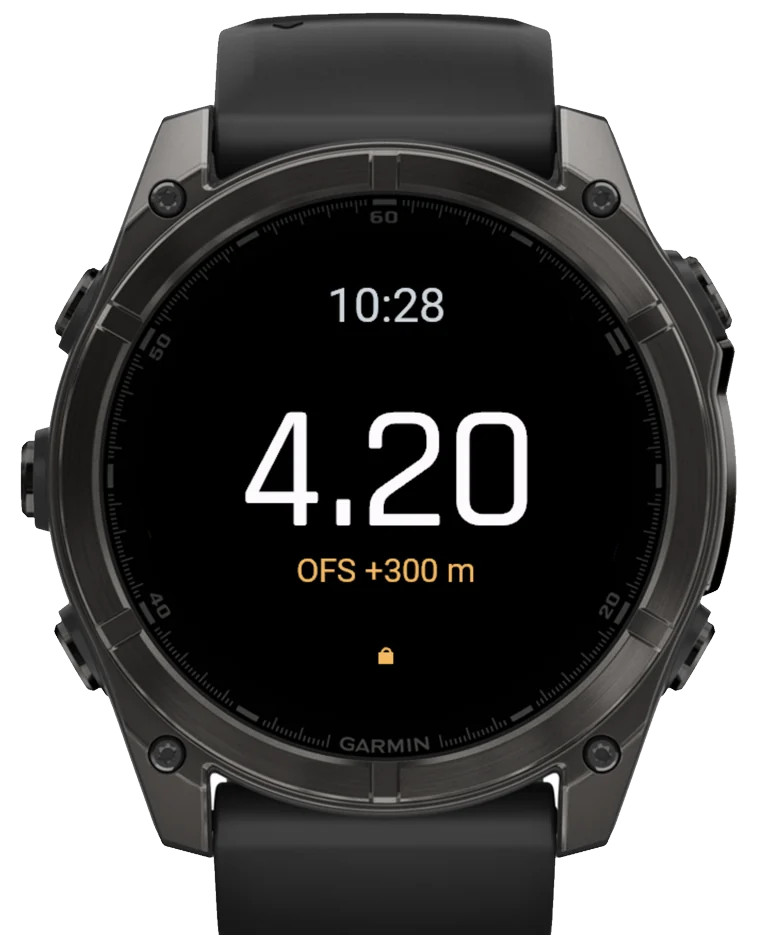
- While an offset is active, an amber
OFS +300 mbadge shows on every screen so you can't forget it. - The offset clears itself at midnight (local time), so the next jump day starts clean – re-enter it if you need it again.
- Jump detection is unaffected: exit, deploy and landing are still detected normally.
Bright Screen
Bright Screen controls when AltiFenix turns the backlight up to full and keeps re-lighting it so the altitude stays readable without you waking the screen:
- Off – do nothing; the screen dims on the watch's normal timeout.
- During Jump (default) – lit through freefall and canopy; dark on the climb to save battery.
- In Air – lit through the climb, freefall and canopy.
- Always – lit the whole time AltiFenix is open.
You can re-lock the screen any time from Settings ▸ Lock Screen – useful if you triple-tapped to unlock it in the air and want it locked again.
Notes:
- It re-lights at full brightness; it cannot override your watch's own backlight timeout setting, so a longer timeout (Watch Settings) helps.
- On AMOLED watches the system enforces burn-in protection and may briefly refuse to hold the backlight – the app re-tries on its own, so you may see the screen dip and come back rather than stay perfectly constant.
- If you tap the top-left light button to turn the screen off in freefall, the app will light it back up within a second. Set Bright Screen to Off if you'd rather it leave the screen alone.
- It costs battery. If you're tight on charge, turn it off and the screen behaves normally (it'll dim on the usual timeout).
Logbook & currency
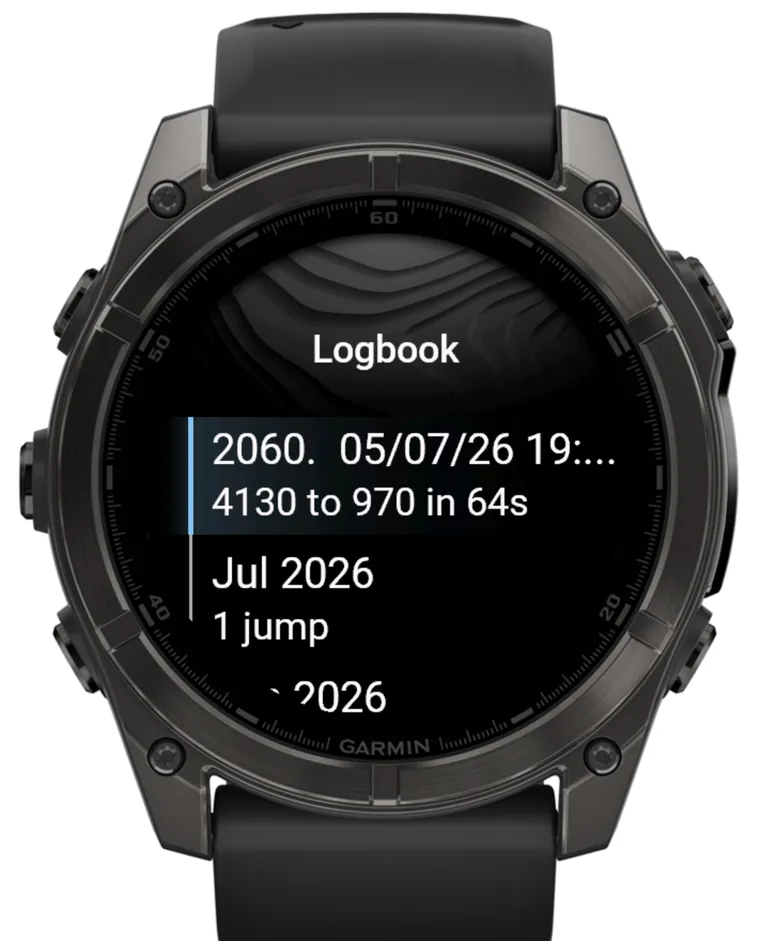
- Logbook (DOWN from Ground): a scrollable list of your recent jumps. Each record stores timestamp, exit altitude, deploy altitude, freefall time, max vertical speed, and canopy time. The watch keeps a rolling history of the most recent jumps; older summaries roll off, but your lifetime total never resets. Open a jump and, if a DZ was set, a DZ row shows the dropzone name (auto-matched from a built-in worldwide list of ~1,300 dropzones, or whatever you typed in DZ Name).
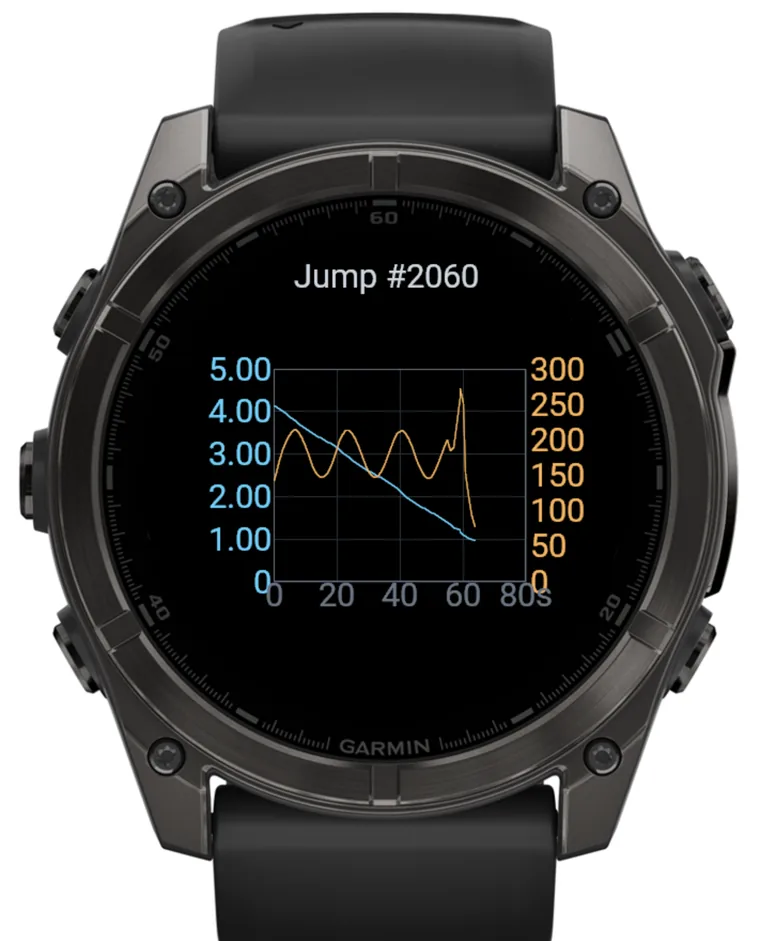
- Freefall graph: open a jump, then select Graph to see your freefall plotted on one gridded chart – altitude (cyan, left scale: m or ft) and descent rate (amber, right scale: km/h or mph) against time in seconds, with labelled axes and gridlines. The trace runs from exit to deploy (up to 5 minutes). It's kept for every jump while there's room in storage; if storage is full the jump still logs but has no Graph row. Older jumps logged before this feature, and any debug-generated jumps, won't have a graph.
- Inspect exact values (scrubber): the graph opens as a clean overview; your first input reveals a cursor. Drag a finger along the plot (touch watches, e.g. fenix 8 AMOLED – the cursor follows your finger) or press UP / DOWN (any watch) to move it. A dot marks the cursor point on each line, thin lines drop to the axes, and the exact altitude (left), descent rate (right), and time (below) print in larger white numbers at those edges. The cursor snaps to real logged samples, so every value is the actual reading. BACK leaves the graph.
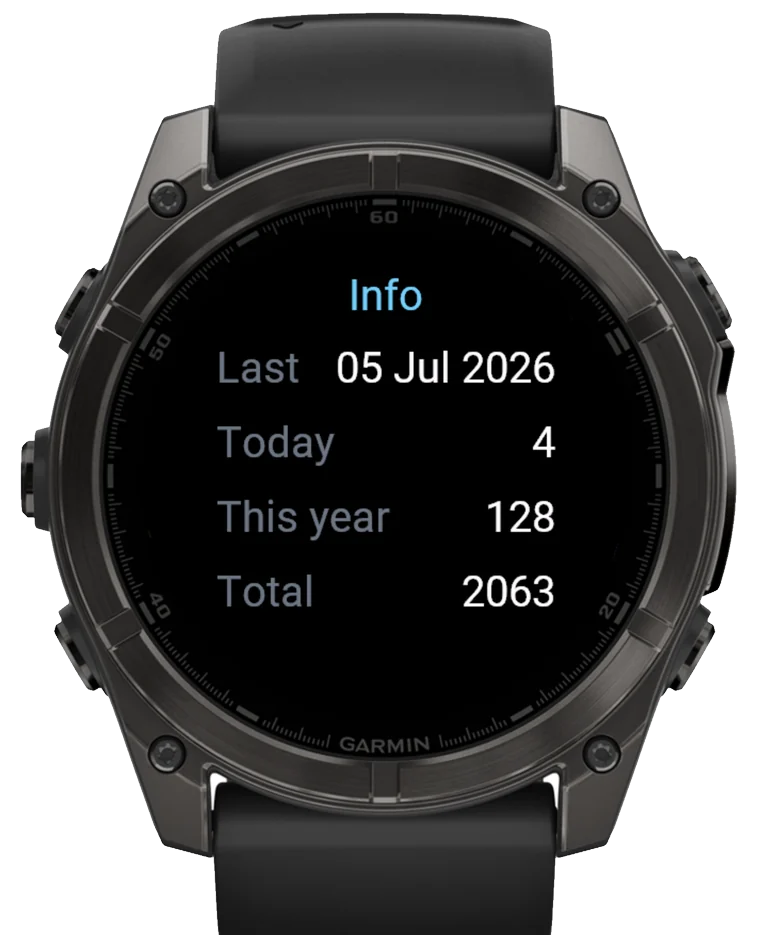
- Info / currency card (UP from Ground): Last jump date, Today, This year, and Total jumps.
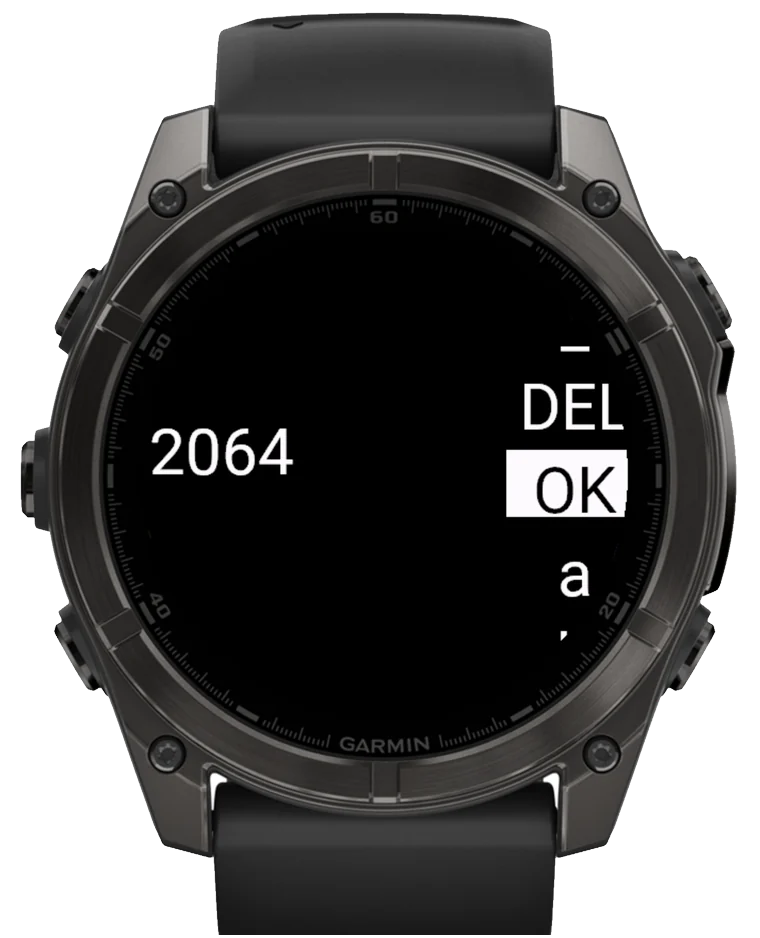
The free trial
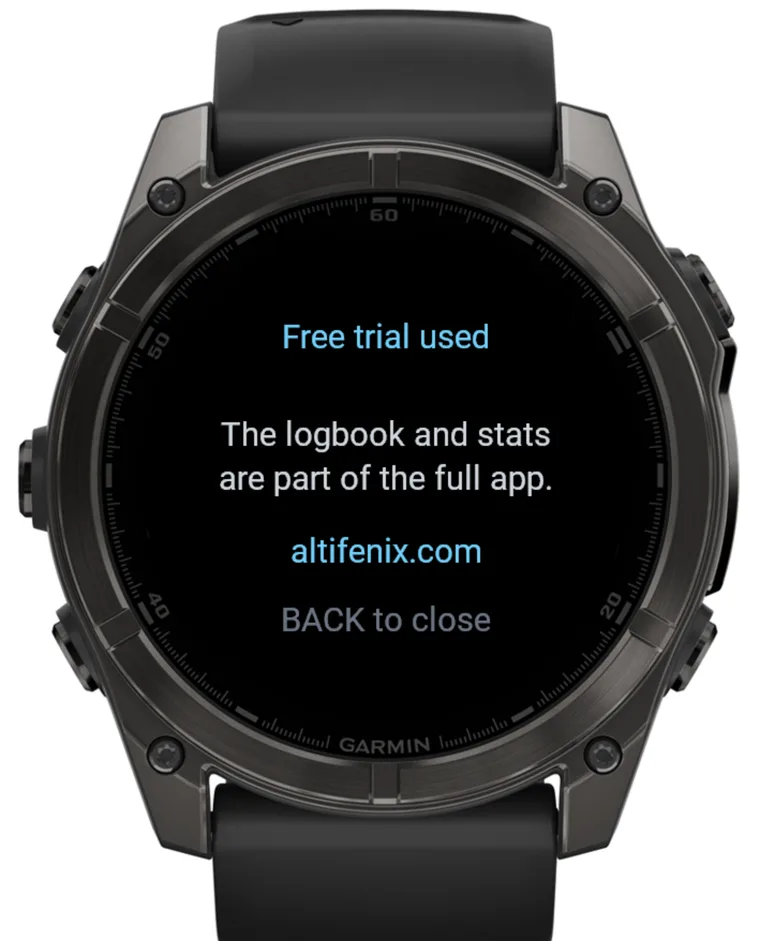
The logbook, currency card and freefall graph are the full-app features: they're free for your first 10 real jumps, after which opening the logbook or the currency card shows a short card (“Free trial used”) pointing you at altifenix.com. One BACK closes it and you're back on the altimeter. The altitude readout, alerts and auto-zeroing keep working as before.
A few details:
- Only real jumps count. The Simulate Jump and Random Jump(s) bench tools never use up the trial.
- It survives a reinstall. The count is tracked both on the watch and on the server (from your uploaded jumps), and the app uses whichever is higher – so reinstalling the app, or a season of airplane-mode jumps, won't hand you a fresh trial or wrongly lock you out.
- Beta testers are comped. If your watch is linked to a beta account, everything stays unlocked no matter your jump count – nothing changes for you.
If your watch is blocked
If AltiFenix opens straight to a black screen reading “AltiFenix” / “This watch is blocked.” / “altifenix.com”, this specific watch has been remotely blocked – for example, after being reported lost or stolen. That screen is the whole app while it's showing: no altitude, no logbook, no settings, and no button combination gets you past it.
If this is your own watch and you believe it's blocked by mistake, visit altifenix.com or reply to your purchase or signup email and we'll sort it out. You never need to reinstall the app. Every time you open AltiFenix it asks the server whether the block still stands, so open it with your phone nearby (or the watch on Wi-Fi) once we tell you it's lifted. When the app sees that the block is gone, it closes itself – that is the sign it worked. Open it again and it runs normally, with your logbook and settings untouched.
Jump detection & modes
Exit, deployment and landing are detected automatically – there is nothing to start or stop. The two modes tune the detection to the jump type's descent speeds; pick the one that matches before you board:
| Mode | Exit detected | Deploy detected |
|---|---|---|
| Skydive | descent faster than ~24 m/s | descent below ~10 m/s |
| Wingsuit | descent faster than ~10 m/s | descent below ~10 m/s |
Implausible “jumps” (bench tests, a fast elevator, an airliner cabin) are filtered out and never logged.
The big altitude number never depends on this detection – it is always live and correct. Detection only drives logging and the airborne zero-lockout, which are safe to be slightly late.
Known limitations
- Barometric, ~1 Hz. In freefall the number steps ~50 m per update and lags the sensor's internal filter.
- Descent rate is approximate, especially in freefall – it under-reads peak speed. It's most useful under canopy.
- Max speed is vertical only. A wingsuit's glide / horizontal speed is not captured.
Supported watches
AltiFenix is designed and built on a Garmin fenix 8 47mm, and beta testers have it working on several more models. It is built for the wider Garmin lineup that shares the hardware it needs (a barometric altimeter and the 5-button layout), but the remaining builds are untested on real hardware: there is no guarantee the app even launches. If you run it on one of these, please report how it goes – that's exactly the kind of feedback this beta is for.
Confirmed by beta testers: fenix 8 47mm · fenix 7 · fenix 7 Pro · fenix 7X · fenix 7X Pro.
Built for, but untested (your mileage may vary):
- fenix 9 – 43 / 47 / 51 mm (the 47 and 51 mm share one build)
- fenix 9 Pro – 43 / 47 / 51 mm AMOLED, Pro Solar 47 / 51 mm (inReach variants use the same builds)
- fenix 8 – 43 mm, Pro 47 mm, Solar 47/51 mm
- fenix 7S (incl. Pro)
- fenix E
- epix (Gen 2) / epix Pro – 42 / 47 / 51 mm
- Enduro 3
- MARQ (Gen 2), incl. Aviator
- Descent Mk3 (43 / 51 mm) / Descent G2
- D2 Mach 1 / Mach 2 / Mach 2 Pro
- Instinct 3 AMOLED (45 / 50 mm) / Instinct Crossover AMOLED
- Forerunner 955 / 965 / 970
Touch-only and small-screen (under ~220 px) models are intentionally excluded – the button-based safety lock can't work on them.
Beta testing
This section is for beta testers – the bench tools and how to send diagnostics back. Everyday use never needs it.
Bench tools (Debug / Info menu – long-press UP)
The Debug menu is grouped top to bottom – playback at the top, then a live-diagnostics block (phase, profile, DZ status, free memory, build), then display / zero / clear / logbook tools:
- Simulate Jump – replays a realistic jump (~5 min) on the main screen and logs it. It auto-locks input through climb/freefall/canopy exactly like a real jump, so it's also how you rehearse the lock – unlock under canopy with a triple-tap of START, and confirm BACK can't quit the app mid-jump. (Note: it logs a real jump entry – clear it afterwards if you don't want it counted.)
- Zero Manager – a read-only single screen with the whole auto-zero + temperature-compensation state (reference pressure, current pressure, background ground reading, altitude/vertical speed, the temp-comp T0/T/K and its Pa/metre correction, the plateau trend, the still-timer and sample buffer). The bottom line says whether the altimeter is about to re-zero (ARMED) or which gate is holding it off (WAIT air / still / trend / band). BACK exits. Pure diagnostics – it changes nothing.
- Guides – On/Off; layout alignment lines overlay (a development aid; leave Off).
- Show All – momentary test screen (BACK to exit).
- Set Zero, Temp K – zero the altitude now / edit the temperature-compensation slope (active above ~600 m AGL where the cold-climb drift lives; fades out below so the final approach and landing always read the raw sensor).
- Clear DZ, Clear bg pressure, Clear state – diagnostics and resets.
- Random Jump / Random Jumps – seed fake logbook entries (for testing the list).
- Clear logbook – deletes all jumps (asks to confirm).
Use Simulate Jump to get comfortable before the first real jump.
Sending logs back
The on-watch log only exists if you created the optional AltiFenix.txt seed file (see Installing). To send logs back, copy GARMIN/APPS/LOGS/AltiFenix.txt off the watch and email it to hello@altifenix.com. To start a fresh log, replace it with an empty file again. After a crash, please also grab GARMIN/APPS/LOGS/CIQ_LOG.TXT (and .BAK) – that's the watch firmware's own crash report.